Monday 24 February 2014

Spiced Pear & Dark Chocolate Chunk Bread & How I Learned To Cook


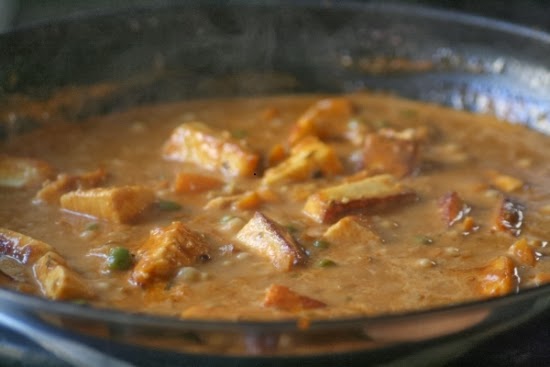
I learned how to cook very young and I was terrible at it for a very long time. My Mum was a divorced, working Mother, which meant that growing up she was often at work during dinner time. So in the evenings I was left with a kitchen at my disposal, no internet or cook books and a hungry belly. My Mum had taught me the basics, how to cook pasta, the perfect hardboiled egg and bechamel sauce. So, you can imagine my meals weren't particularly appetising. Eventually I graduated from using jars of store bought pasta sauce on top of woefully over-cooked spaghetti to learning what 'al dente' is and making my own pasta sauce with olives, garlic, feta and lemon. I happily lived off that for years.


I moved in with my boyfriend (now husband) when I was 17 years old. He couldn't cook beyond making toast, and with our cooking powers combined our diet consisted heavily of take away and store bought frozen meals. Surprisingly one can only live on tater tots and pizza for so long.


By now I had a much-loved connection to the internet and I began to explore the world of cooking blogs. I was inspired by so many people who seemed to be able to create incredible dishes with the greatest of ease. The food looked ethereal and I was envious, so very envious


I soaked up every bit of information I could, how to pick the best ingredients, how to balance flavours and textures, how to leave behind packet mixes and cook from scratch. I loved every minute.

Sure it was hard and frustrating and I never did quite manage to make that evasive white chocolate mud cake, even after 3 attempts and wasting over a kilo of chocolate. But boy I was overjoyed to be able to finally place something delicious on the table that I had worked hard on, with love and patience.


Now that I have a family of my own cooking has become something we do together. Each meal is an opportunity to learn together, to talk, to savour each other's company and the wonderful things we can create when we work together. My son, Oscar loves to "mix mix", scoop and pour. He's a dedicated taste-tester too. I ask him what he thinks, does it need more sugar? Salt? Is it thick enough? I encourage him to create recipes and different flavour combinations. I often catch him flicking through my cookbooks, scanning the pages for something "mmmlicious!.


Cooking with kids is a messy and sometimes disastrous business, but it makes me giddy with excitement to see my cooking passion instilled in that little man. It's a comfort to know that this is one thing ticked off the list in creating a well-rounded and independent adult, not to mention breakfast in bed is just around the corner. ;)

This recipe is largely thanks to my son, I needed to use some pears and the idea to make it a bread and add chocolate chunks was his hungered request. Oscar and my husband, Keith, kindly tested out the recipe for me with winning results. Kid, husband and food blogger approved! This is a moist (not doughy) bread with a hint of spice, it's best eaten warm for the full 'oozing chocolate' effect. I served it with a side of good quality salted butter and some honey-drizzled fresh figs but it was also delicious the next day, plain and simple with a cup of chai tea.


Spiced Pear & Dark Chocolate Chunk Bread

Recipe by A Rhubarb Rhapsody
Total time: 45 minutes
Serves: 4-6

Ingredients
  • 2 cups plain flour
  • 1 teaspoons baking powder
  • 1 teaspoon baking soda
  • 1/4 teaspoon salt
  • 1/2 cup brown sugar
  • 1 1/2 teaspoons cinnamon
  • 1/2 teaspoon nutmeg
  • 1/2 cup greek/natural yoghurt
  • 2 eggs at room temperature
  • 2 teaspoons vanilla extract
  • 500g (1lb 1oz) very ripe pears, peeled cored and mashed (about 3 medium pears)
  • 2 tablespoons oil or melted butter
  • 90g dark chocolate, cut into chunks

Cooking Directions 
  1. Preheat oven to 175°C/ 345°F. Grease load tin and line with grease-proof baking paper, set aside.
  2. In a large bowl sift flour, baking powder and baking soda together. Add brown sugar, cinnamon, nutmeg and salt. Whisk until combined.
  3. In a medium sized mixing bowl mix the mashed pears, yoghurt, eggs, vanilla extract and oil/butter together.
  4. Pour the wet ingredients into the dry ingredients and gently mix until just combined (do not over mix). Carefully fold the chocolate chunks into the mixture.
  5. Pour the batter into the pre-prepared loaf tin and bake for 45 minutes or until a skewer comes out clean. Let the loaf cool in the tin for 5 minutes before turning out onto a cooling rack, wait until it's at room temperature before cutting and serving.

Saturday 22 February 2014

The Weekend Review: Breakfast at PLENTY, Windsor

I have to confess that since my little family upped and moved across the country to delightfully rainy Melbourne we've gotten into the habit of having breakfast at a different cafe every weekend without fail. Sometimes we get caught up in the hustle and bustle of all the vibrant eateries at our doorstep and we may not cook a single meal all weekend. I suppose I'm out of the running for domestic goddess of the year now, aren't I? I love exploring all the hidden crevices of this city, so many tiny places radiating the promise of a full belly and no dishes to wash.

One of our recent expeditions was to a relatively obscure cafe on bustling Chapel St. I'll admit in our sleep-deprived haze we initially walked right past it. There's very little signage and unless you look closely I'm sure my fellow sleepy heads could also drift on by. We eventually arrived at around 8:30am, it was about half full and we were cheerily greeted and seated. Our drink order was taken while we hungrily perused the menu. I was on a sweet mission and opted for the 'Ricotta pancake, maple syrup & pistachio butter', Keith selected the 'Fruit pot, granola crumbs, buffalo yoghurt' and Oscar excitedly chose the 'Fruit toast with lemon curd'.


We placed our order and our coffees arrived promptly. The flavour was decent, a nice grind but the milk texture was a little watery and the temperature was a bit cooler than I'd like. I'm not one of those people that insists on HOT coffee but even I'd say the coffees were barely on the higher end of warm. Still, enjoyable overall. We finished our coffees early on in our visit and I would've like to have been asked if we wanted another coffee (we did!).

Our meals arrived after a fair wait, which was reasonable on a Saturday morning. All the meals were served at once. Thank you! Pretty sure my toddler thinks the world is going to end if his parents get their meals and he has to wait on his. So I'm always overjoyed when this crisis is averted.

My pancake was the thickest pancake I've ever encountered. I braced myself for something horrendously dense, or undercooked but I was very pleasantly surprised. It was crisp on the outside yet light and cake-like on the inside, the pistachio butter was simply beautiful, so much so I'm intent on making my own version in the near future. I devoured my meal with glee, the only thing I found I was wishing for was a bit of zing to the dish. The buttery, nutty, syrupy pancake felt quite 'heavy' by the end and I found myself longing for a bit of bitterness to cut the richness. The mild acidity in the ricotta wasn't enough. I'd suggest something like a touch of lime zest in the pancake batter would help lift the dish, but honestly it was one of the best pancakes I've been served in many months.

Ricotta pancake, maple syrup & pistachio butter ($13)


Keith's fruit pot was presented in a charming terracotta plant pot and brimmed with a wide variety of fresh fruit such as mango, raspberries, strawberries, rockmelon, pineapple and more. There was just enough yoghurt and the granola was chewy and flavoursome which added a welcome textural contrast.

Fruit pot, granola crumbs, buffalo yoghurt ($10)


Oscar's fruit toast was a pleasant surprise. He often gets one, occasionally two slices of thin fruit toast when we order out. At PLENTY he received three thick slices of fruit-laden toast and plenty of lemon curd to cover each piece. He wolfed down every bit and I'm pretty sure he would've taken the remaining lemon curd home had we let him.


Throughout the meal our water was refilled regularly and our empty cups and plates were cleared promptly. The staff were attentive without being overbearing. The serving sizes were generous and the prices were low compared to the surrounding competition (of which there is a lot). We left our plates empty but we were all full and content. On our way out we grabbed a couple of take away coffees for our trek back home and I'm sad to say these were rather bitter/burnt, very different to the coffees we'd had when we arrived.

During our visit we never felt rushed to free up our table, even though as time went on PLENTY was filling up rapidly. The atmosphere was casual, and comfortable. The decor is simple and sparse, which considering it's space constraints seems to be a wise choice. It's a kid friendly place and it was nice to see the staff happily chatting to the children dotted about. I will point out that it could be tricky to navigate PLENTY if you have a pram due to the narrow walkways so you'd be better off carrying bub, especially on the weekend when there's a steady flow of patronage.

Overall PLENTY is a welcome addition to the popular Chapel St cafe scene and is a solid option for an enjoyable and affordable breakfast. Quality produce and genuinely friendly service is certainly plentiful.


PLENTY on Urbanspoon

Thursday 20 February 2014

Fresh Fig, Thyme & Goats Feta Tart with Balsamic Drizzle


On Tuesday I received a call from Oscar's kindy, he was sick and running a high temperature, he needed to come home. So all my food blogging, toilet cleaning, coffee drinking plans went on hold and out came the tissues and baby Panadol.


I have fond memories of being well cared for during periods of illness as a kid. I felt swathed in love. My many menial requests were tended to with patience and care (something I'm still working on replicating). Subsequently I dote on my son when he's streaming boogers, crotchety and highly contagious. I have a new-found respect for my Mother's ability to hide all revulsion/irritability whilst collecting my used tissues and putting up with my demands for home cooked meals, which I inevitably wouldn't eat because everything tasted funny. Sorry Mum!


Caring for a kid that "can't stop the cough-ers" is time consuming and exhausting which is why this recipe was perfect for dinner. I set my son up on the lounge with a blanket, pillow and warm honey milk to watch Pinocchio for the umpteenth time whilst I set to work on the tart.


Clotilde from Chocolate & Zucchini had recently posted a recipe for Rough Puff Pastry which I was desperate to try. The claims of it being life-changing are true. The layers are delicate, crisp and melt in your mouth but the best part is that it is so deceptively easy. You know how sometimes people claim a recipe is "so easy" but yet it takes four hours of your time, Italian Nonna biceps, and bomb-diffuser concentration? This is not that kind of easy. This is: I put my pants on backwards, haven't slept in two days, my fridge is bare kind of easy. But if you just really can't be bothered, store-bought puff pastry will be just fine. It's cool, we can still be backwards pants wearing friends.


Fresh Fig, Thyme & Goats Feta Tart with Balsamic Drizzle

Recipe by A Rhubarb Rhapsody
Total time: 45 minutes
Serves: 4-6

Ingredients
  • 325g (11 1/2 ounces) puff pastry, I used this recipe but store bought is fine 
  • 4-5 ripe, fresh figs, sliced into fine wedges 
  • 6 sprigs of thyme (plus more for garnish) 
  • 1 large brown onion 
  • 2 tablespoons of butter 
  • 1 block of goats feta (about 180g/6oz) 
  • 1 large egg 
  • Egg wash (1 egg whisked with 1 teaspoon of water) 
  • 3 1/2 tablespoons brown sugar 
  • 1 tablespoon balsamic vinegar 
  • 1 tablespoon water 

Cooking Directions 

1. Preheat oven to 185°C/365°F. Line a large baking tray with greaseproof paper and set aside.
2. Finely slice the onion. Melt the butter in a small pot, add onion and thyme and cook over low-medium heat until the onions soften and become translucent. Discard the thyme. 
3. While the onion is cooking, cut the goats feta into chunks and place it along with the egg in a food processor. Season with freshly cracked pepper. Process until well combined and smooth.
4. Roll your pastry out to form a roughly 30cm rectangle, fold the edges over (about 1cm) to frame the tart and press with a fork. Brush the edges with egg wash.
5. Spread the goats feta mixture over the pastry (except for the 'frame'). Top with onion. Carefully layer sliced figs on the very top.
6. Bake for about 25 minutes or until the pastry is golden brown. While the tart is baking place the balsamic vinegar, brown sugar and water in the small put you used to cook the onion. Cook over medium heat, stirring often until it begins to boil. Turn off the heat. It should thicken on cooling.
Serve the tart warm, garnished with fresh thyme and drizzled with the balsamic glaze.

Monday 17 February 2014

Mixed Stone Fruit Crumble Bars & A Glimpse Of Things To Come.


This week has been filled to the brim with cooking, baking and perhaps a little too much eating. But hey, sometimes a bit of indulgence is exactly what the baker ordered. Over this time a desperate yearning for a dishwasher has been more prevalent than ever before. I've been teaching my son Oscar to cook, but now I know I really should have been teaching him to wash the dishes instead!


Apart from fulfilling the role of dish wench all too well, I've been working on a few recipes to share with you in the near future. As I mentioned in a previous post I've been creating my own fruit version of Noah's Ark so there will be quite a few fruit based recipes on the horizon. Coming soon to a post near you: Spiced Pear & Dark Chocolate Chunk Bread. Banana, Coconut & Macadamia Muffins. Or for something a bit more savoury to wash the sugar down, a Fig, Thyme and Goats Feta Tart.

There's a few other surprises on the way but in the meantime lets talk about today's recipe. It's an adaptation of White on Rice Couple's 'Fresh Apricot Bars'. Unbelievably, I did not have enough apricots. So, my version consists of pluots, apricots and peaches but just use whatever stone fruit takes your fancy. Once I begin tweaking a recipe it just kind of avalanches, a couple of differences you'll see in this recipe are the addition of almond meal and shredded coconut. I found these flavours added some depth and textural contrast to the dish but if you're not a coconut fan (Surely this isn't possible!) then just replace it with oats and all will be well in the world.

Seeing as I have very little patience when it comes to letting food rest, even when strictly instructed to do so, I dove straight in. Let me tell you, you really, really can't get these out of the tray neatly when they're still warm. So I served it as crumble with a side of home made caramel ice cream. I dutifully put the rest of the bars in the fridge, an hour or so later they were much easier to cut and serve. The moral of the story is: if you want them to actually be bars rather than a jumbled mess, it's best to hide them in the back of the fridge and forget about them for an hour or two.


Mixed Stone Fruit Crumble Bars

Recipe adapted from White on Rice Couple's 'Fresh Apricot Bars'
Total time: 1 1/2 hours
Yield: 9-12 bars.


Ingredients
  • 900g (2 lbs) Assorted stone fruit (I used apricots, pluots and peaches) 
  • 2/3 cup sugar 
  • 1 teaspoon vanilla extract 
  • 3/4 cup plain flour 
  • 1/4 cup almond meal 
  • 1/2 cup brown sugar 
  • 1/4 teaspoon salt 
  • 1/2 teaspoon baking soda
  • 1/2 cup (115g) chilled butter, cubed 
  • 2/3 cup rolled oats (not quick oats) 
  • 1/3 cup unsweetened shredded coconut
Cooking Directions
  1. Preheat oven to 175°C/350°F. Grease a 2 quart baking dish, line with greaseproof paper and set aside.
  2. Slice your stone fruit into slim wedges (you can remove the skin if you like but it isn't necessary).
  3. Combine the stone fruit and sugar in a saucepan. Cook over medium heat until the fruit is soft and starting to collapse. stir through the vanilla extract.
  4. Crush the fruit with a potato masher until it's the consistency of a lumpy jam. Pour into a bowl and place in the freezer to chill while you make the crust.
  5. In a bowl, whisk together the flour, almond meal, brown sugar, salt, and baking soda. Cut the butter into the flour with a pastry cutter (or use a food processor), until it resembles coarse sand. Mix in the oats and coconut until well combined.
  6. Press 2/3rds of the crust mixture evenly into the bottom of the prepared baking dish. Spread the fruit over the crust. Sprinkle the remaining crust over the top of the fruit.
  7. Bake for 1 hour or until the crust is golden brown. Allow to cool to room temperature then place in the fridge for at least an hour or until it's firm enough to cut and serve. 
    Can be stored in the fridge for up to 3 days. Freezes well.

    Thursday 13 February 2014

    Supremely Chewy, Fudgy, Chocolate Brownies (The Old Reliable)


    I wasn't originally going to post this recipe, because in all honesty who doesn't have 145 different brownie recipes bookmarked? (I may have a minor crush on this homely dessert) I've tried my fair share of brownie recipes, and then somebody elses share, and probably some other dude's share too. I have an appreciation for the over top, heart-stopping (almost literally), multi-faceted brownies that almost make you sugar-drunk merely by looking at them. BUT. Time and time again I find myself coming back to this recipe, the old reliable, my never fail. It's a brownie recipe delicious in it's pure simplicity. No frills, honest to goodness chocolate and it's all the better for it. As such, you absolutely must use the best chocolate you can get your brownie-loving hands on, no ifs, buts or maybes.

    This recipe is an adaptation of a David Lebovitz recipe. Let me be upfront and say I adore this man's recipes like they were my own little recipe nephews and recipe nieces. I've made a good chunk of his creations and the only time I've been let down was when I wandered off the path and didn't follow the directions provided.

    If you have your heart set on amping it up, mix-ins I'd recommend are: roasted hazelnuts, cherries, raspberries, chocolate-coated coffee beans or swirl in some home made caramel sauce before baking.

    I'll warn you now, these are rich. Correction, these are super rich. They're claggy and dense with a film of chewiness on the outside. There's nothing cakey or timid about these bad boys. Serve them in small portions. And, if you've dirtied all your dishes from 'food blog baking', feel free to eat them straight off the baking paper they were cooked on. No judgement here my friend.


    Supremely Chewy, Fudgy, Chocolate Brownies

    Recipe adapted from David Lebovitz's 'Robert's Absolute Best Brownies', Ready for Dessert, p. 196
    Prep time: 10-15 minutes
    Cook time: 30 minutes
    Yield: Serves 9-12

    Ingredients
    • 85g butter
    • 35g very good quality milk chocolate (I used Whittaker's 33% Cocoa Creamy Milk)
    • 190g very good quality dark chocolate (I used Whittaker's 72% Dark Ghana)
    • 150g caster sugar
    • 1 teaspoon vanilla extract
    • 1 teaspoon instant coffee (you won't taste it but it'll add depth)
    • 2 large eggs, at room temperature
    • 35g plain flour

    Cooking Directions
    1. Preheat your oven to 180C. Generously grease an 8 inch square cake tin, line with baking paper and set aside.
    2. In a medium saucepan melt the butter, take off the heat and add the chocolate. Stir until the chocolate's completely dissolved.
    3. Add the sugar, vanilla and coffee. Stir until combined. In a small bowl whisk the eggs then stir these into the chocolate mix.
    4. Add the flour and stir like crazy for 1 full minute. Do not skip this step or count quickly, the brownie gods are watching and they will smite you.
    5. Once the batter is no longer grainy but is instead glossy and silky pour it into the prepared cake tin. Bake for approximately 30 minutes or until the center is just set (I baked mine for 20 minutes and they were mega fudgy).
    6. Let them cool in the tin completely before you attempt to remove them. In order to cut them neatly I fridged them for about an hour so they were quite solid and easily sliced. Make sure they come to room temperature before devouring them. Enjoy!

    Tuesday 11 February 2014

    Peach & Raspberry Meringue Pudding (Queen of Puddings)


     Sometimes I go overboard, like way overboard, like I'm pretty sure I've lost every ounce of logic overboard. I'm one of those people that latches onto an idea and then overthinks every aspect. I decided I'd like to sew, within a week I've accrued a new sewing machine, a chair to sew in, a whole array of different sewing tools that look like medieval torture instruments and I am currently on my third full load of washing of newly attained fabric. I've gathered up everything I could think of that I might need. I over invest so that I force myself to stick with it. Surely my desperate need to make my room less than half-filled with fabric will result in some amazing sewing accomplishments. Surely..


    In a similar over-enthusiastic mood I purchased a butt load of fruit. As in, my prep counter is covered in bananas, pluots (apricot x plum), pears, nashis, peaches, apricots, passionfruit and more. The original thought was "I'd like to bake with some fruit this week" a few days later a box of perfectly ripe seasonal fruit arrived from The Leaf Store (more about them later). I'd wandered through their website aimlessly selecting produce, planning recipes gleefully, and quickly lost sight of the enormous fruit pile I was creating. What I'd thought would be a relatively reasonable amount of fruit turned out to be enough to feed my family on fruit alone for a week. Probably should've factored in my visit to the farmer's market a mere 2 days beforehand where I'd also stocked up on fruit. Whoops!


    So here we are, this the first recipe of what will undoubtedly be a week long fruit bake-athon. I've selected a pretty little number from one of my copies of Australian Gourmet Traveller magazine. It's a truly simple recipe that looks a bit fancy and tastes wonderful. It's not overly sweet, which really lets the fruit's flavour shine through. There's an array of flavours (lemon, peach and raspberry) and textures that really tantalise the taste buds. It starts with a layer of custard & bread pudding, then a layer of raspberry jam, followed by fresh peach slices and finally topped with a chewy, marshmallowy meringue.


    Below I've typed up the original recipe and noted a couple of changes I made along the way. It's a versatile recipe, you could swap out the peach for any stone fruit of choice. Next time I think I'd throw in some crystalized ginger too. Also, please excuse the slight blackening of the meringue, I'm easily distracted.


    Peach & Raspberry Meringue Pudding
    Prep time: 15 minutes
    Cook time: 40 minutes (plus 10 minutes for soaking)
    Yield: Serves 6

    Ingredients
    • 600ml warm milk
    • 50g butter, coarsely chopped
    • 150g fine fresh chopped breadcrumbs
    • 80g caster sugar
    • 1 teaspoon vanilla bean paste (*I used seeds of one vanilla bean and 1 teaspoon of vanilla extract*)
    • finely grated rind of 1 lemon
    • 3 eggs, separated
    • 250g raspberry jam (*use home-made or very good quality*)
    • 650g yellow peaches, halved, stones removed and cut into wedges (*I finely sliced 3 large, white peaches and it was lovely*)

      Cooking Directions
      1. Preheat oven to 180C. Stir warm milk and butter in a saucepan over medium heat until almost boiling, transfer to a bowl with breadcrumbs, 25gm sugar, vanilla and lemon rind and set aside to soak (10 minutes). 
      2. Whisk egg yolks into breadcrumb mixture, pour into a buttered 1.5-litre baking dish, bake until just set (20-25 minutes), spread with jam and scatter with peach wedges. 
      3. Whisk egg white and a pinch of salt in an electric mixer until soft peaks form (2-3 minutes), then, whisking continuously, gradually add remaining sugar and whisk until stiff and glossy (2-3 minutes). Spoon in peaks over peaches and bake until golden brown (12-15 minutes). Serve hot.

      Sunday 9 February 2014

      Creamy Coconut, Paneer and Tomato Curry


      Remember way back when, on that wonderful day when I shared with you a recipe for making your own paneer? Those were the days weren't they? Well, finally, you have a reason to actually make aforementioned paneer. This is my tried and true and forever loved paneer curry recipe. It's a cinch to make, the trick is to have all your ingredients prepped and ready to go, if you've done that then I guarantee you will have a spare hand to hold that hard-earned glass of wine you've been pining for.


      This recipe is my little piece of Indian comfort food. It freezes well so is fantastic to pull out of the freezer on those nights when you just really can't be bothered. I tend to serve it on top of some fluffy basmati rice with a side of some home made naan. An ice cold mango lassi washes it all down superbly.


      I know it's not the most photogenic meal you've ever seen, but give it the benefit of the doubt. What it lacks in looks it makes up for in flavour.


      Creamy Coconut, Paneer and Tomato Curry

      Recipe by A Rhubarb Rhapsody
      Prep time: 10 minutes
      Cook time: 30 minutes
      Yield: Serves 4-6

      Ingredients
      • 1 batch home-made paneer (or 300-400g store bought paneer)
      • 1 large onion, finely diced
      • 2 medium carrots, diced
      • 1/2 cup frozen peas
      • 1 Tablespoon minced ginger
      • 1 Tablespoon minced garlic
      • 2 Tablespoons ground coriander
      • 1 Tablespoon ground cumin
      • 2 teaspoons garam masala
      • 1 teaspoon kasuri methi (dried fenugreek leaves)
      • 1 teaspoon chilli powder (add more if you like it spicy)
      • 2 Tablespoons tomato paste
      • 2 Tablespoons tomato ketchup/sauce
      • 1 cup milk (or whey)
      • 1 cup coconut cream
      • 1/2 cup whipping cream (heavy cream)
      • ghee or oil 
      • salt to taste
      Cooking Directions
      1. Heat a small amount of ghee or oil in a skillet/frying pan, in two batches, fry the paneer/tofu cubes until light golden brown. Place paneer on a paper towel covered plate and set aside to drain. 
      2. In the same frying pan, add 2 more tbsp ghee or oil and fry the onion and carrots until the onion becomes translucent.
      3. Add the ginger and garlic and fry for a minute
      4. Next, add the ground coriander, cumin, garam masala, chilli powder and some salt. Fry for 30 seconds.
      5. To this, add the tomato paste, tomato sauce and kasuri methi. Mix well and add the milk and peas.
      6. Turn heat down to a gentle simmer and cook covered for 5 mins.
      7. Add the fried paneer, the cream and coconut cream. Mix well, put lid back on and simmer for a further 3-4 mins. Serve and enjoy!

      Wednesday 5 February 2014

      #VMteaoftheday and why I shouldn't be afraid of the dentist.


      Oh boy, I'm in a world of pain. No, not metaphorically. I've got myself a healthy dose of physical pain. You see, I unwisely decided to cling fast to my wisdom teeth, because ironically enough I don't like pain. Those ungrateful suckers have since caused me a world of grief. The last few days I've been cradling my cheek and praying to the not-so-merciful dental Gods. Due to the aforementioned agony I've been pretty much living off tea and soup. This liquid diet and my general grouchiness has surely given my husband a glimpse into our elderly future together, poor guy.

      So this, afternoon as I was cautiously sipping on yet another cup of tea (one of my sole links to the consumable world) I happened upon The Veggie Mama's "Tea With Me" post. And as such, here I am sharing with you my soothing beverage. It's a plain old peppermint tea, something I've probably drunk my weight in ten times over, over the course of the last few days. You can see it's pointlessly accompanied by a side of home-made ganache-coated pecans. I sucked on one for about 15 seconds and then woefully gave up. One day chocolate, we'll be together again.

      Gratefully accepting any recipes that can be slurped up with the greatest of ease. A woman can only live on peppermint tea and onion soup for so long.


      Monday 3 February 2014

      A Valentine's Recipe: Strawberries & Cream Stuffed French Toast With Nutella Fudge Sauce


      So, I hear Valentine's Day is fast approaching. Personally I don't tend to make a big fuss, for me it's an excuse to indulge in good food, good wine and great company. Sometimes my husband and I exchange small gifts but this year we're just focusing on having a relaxing and enjoyable day together, no gifts required. I'm one of those people that are a nightmare to buy for. I always prefer experiences over objects. I'd much rather go on a picnic than get a new bracelet.


      This year we'll be heading to the beach as a family, having a simple home made lunch, maybe a park visit for the kiddo, followed by a bottle or two of fancy vino for us and take away from our favourite restaurant for dinner. As laid back as I am about this holiday there is one thing I think is absolutely crucial on Valentine's Day, breakfast in bed. In motherhood it is a rare and sacred occasion and as such I've come up with something a little bit special and a little bit decadent.


      I've combined a few elements here which I think work wonderfully together. Thick cut french toast, fresh strawberry and cream cheese filling, smothered in a Nutella fudge sauce. Use the best quality ingredients you can find and you're sure to have an amazing bed-feast!

      So, what's on your Valentine's menu this year? And, do you have some grandiose romantic plans in the works?


      Strawberries & Cream Stuffed French Toast With Nutella Fudge Sauce

      An original recipe by A Rhubarb Rhapsody
      Prep time: 30 Minutes
      Cook time: 20 Minutes
      Yield: Serves 2

      Ingredients
      • 4 slices of thick-cut, day old bread (I used ciabatta)
      • 1 tablespoon sugar
      • 1 cup milk
      • 2 eggs
      • 1 tablespoon plain flour
      • 125g/4.4oz cream cheese (about half a package of Philadelphia cream cheese)
      • 125g/4.4oz fresh strawberries
      • 1/4 cup icing/superfine sugar
      • 1 teaspoon vanilla extract
      • 1/2 cup Nutella
      • 1/4 cup cream
      • butter for frying

          Cooking Directions
          1. In a mixing bowl whisk together the milk, flour, 1 tablespoon of sugar and the eggs. Set aside.

          2. Roughly chop the cream cheese and place it in your food processor along with the vanilla extract. Sift the superfine sugar over the top. Blend until smooth.

          3. Behead the strawberries and stick them in the food processor too. Blitz it until combined but leave some strawberry chunks!

          4. Thickly spread the strawberry mixture onto one piece of bread, top with another piece of bread and repeat so you have two sandwiches.

          5. Pour your egg and milk mixture into a deep sided dish (I used a pie dish). Place the sandwiches in the egg mixture and let them soak for 5-10minutes, turn and soak the other side for 5-10minutes too.


          6. Get out a large heavy bottomed frying pan (skillet), and melt a knob of butter over low-medium heat.
          Ridiculously good market fresh butter.


          7. Place your eggy sandwiches in the frying pan, cooking for about 5 minutes each side or until lightly browned and cooked through. While these are cooking, make the Nutella fudge sauce.
          8. To make the Nutella sauce, place the Nutella and cream in a small saucepan and heat over low heat, stirring constantly until combined and hot.
          Serve french toast with freshly cut strawberries, a sprinkling of superfine sugar and a hefty dousing of Nutella fudge sauce! Enjoy!